How to Use Webflow for Beginners: Build Professional Websites Without Coding

Learn how to use Webflow to create stunning, professional websites without coding skills. Our beginner's guide covers everything from setup to publishing.

How to Use Webflow for Beginners: Build Professional Websites Without Coding

Table of contents:

See more

How to Use Webflow for Beginners: Build Professional Websites Without Coding

Webflow has revolutionized website creation by enabling designers, marketers, and entrepreneurs to build professional websites without writing a single line of code. 

If you're new to web design or looking for a more visual, intuitive alternative to traditional website builders, Webflow offers the perfect balance of creative freedom and ease of use.

This comprehensive guide will walk you through everything you need to know to get started with Webflow, from creating your first project to launching your website. 

Whether you're a freelance designer, small business owner, or marketing professional, you'll discover how to leverage Webflow's powerful features to create a stunning online presence.

What is Webflow?
Webflow

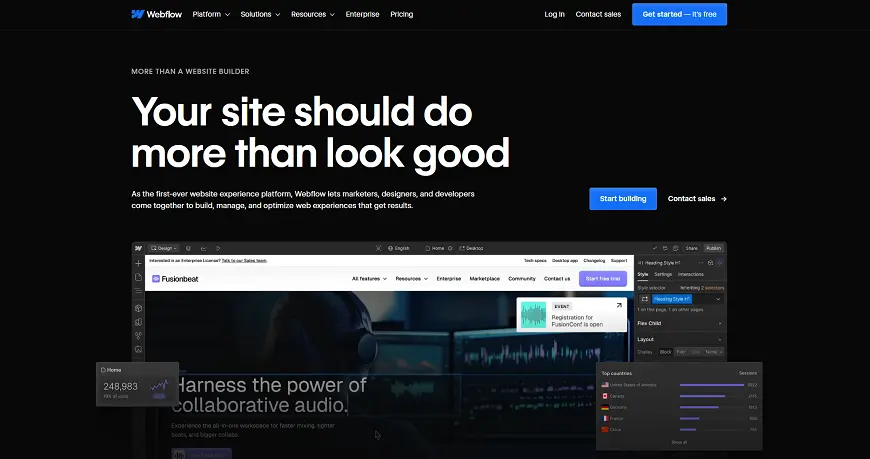
Webflow is a visual web development platform that combines the flexibility of custom code with the accessibility of a no-code tool. Unlike traditional content management systems (CMS) like WordPress that separate the design interface from the live site, Webflow's visual editor shows you exactly how your changes will appear in real-time.

At its core, Webflow consists of three main components:

  1. The Designer: A visual canvas where you build and style your website using intuitive drag-and-drop functionality
  2. The CMS: A powerful content management system for creating dynamic, database-driven content
  3. The Editor: A simplified interface that allows you or your clients to update content without affecting the design

What sets Webflow apart from other website builders like Wix or Squarespace is its professional-grade output. The platform generates clean, semantic HTML, CSS, and JavaScript that mirrors what a skilled web developer would write by hand. This results in faster, more SEO-friendly websites that offer maximum design flexibility.

Take your website design to the next level with our stunning collection of Webflow templates. making them more manageable

Why Choose Webflow as a Beginner?

While Webflow has powerful capabilities for professional developers, it's also an excellent platform for beginners for several key reasons:

1. Visual Learning Experience: Webflow's visual interface helps beginners understand web design principles more intuitively. As you drag, resize, and style elements, you're learning the fundamentals of HTML and CSS without having to memorize code syntax.

2. No-Code Design Freedom: Unlike many drag-and-drop builders that limit your design options, Webflow gives you complete creative control without requiring coding knowledge. You can create custom layouts, animations, and interactions that would typically require JavaScript expertise.

3. Professional Results from Day One: Webflow's templates and design capabilities allow beginners to achieve professional-looking results immediately. The platform handles technical details like responsive design, optimization, and cross-browser compatibility automatically.

4. Growth-Ready Platform: As your skills develop, Webflow grows with you. The platform supports everything from simple landing pages to complex, database-driven websites with e-commerce functionality, meaning you won't outgrow it as your projects become more ambitious.

5. Supportive Learning Community: Webflow has invested heavily in educational resources, including Webflow University, an extensive library of tutorials, and a vibrant community forum where beginners can find help and inspiration.

Take your website design to the next level with our stunning collection of Webflow templates. making them more manageable

Getting Started with Webflow: Step-by-Step Guide

1. Create Your Webflow Account

Step 1: Visit webflow.com and click on "Get Started" or "Sign Up."

Step 2: Enter your email address, create a password, and verify your account through the confirmation email.

Step 3: Complete your profile by entering your name and answering a few questions about your design experience and goals. This helps Webflow customize your onboarding process.

Pro tip: Start with the free plan to explore Webflow's features before committing to a paid subscription.

2. Navigate the Dashboard

After signing up, you'll arrive at the Webflow Dashboard, which serves as your project management hub. Here you can:

  • Create new projects
  • Access existing websites
  • Manage your account settings
  • View educational resources
  • Track site analytics (on paid plans)

Take a moment to familiarize yourself with the dashboard layout before creating your first project.

3. Start Your First Project

Step 1: Click the "New Site" button on your dashboard.

Step 2: Choose between starting with a template or a blank site:

  • Templates provide professionally designed structures you can customize (recommended for beginners)
  • Blank sites give you complete creative freedom but require more design knowledge

Step 3: If you chose a template, browse the template library by category, style, or purpose. Webflow offers both free and premium templates.

Step 4: Select your template and click "Use Template" or "Create Site" if starting from scratch.

4. Understand the Webflow Designer Interface

The Webflow Designer is where you'll spend most of your time building your website. The interface consists of several key areas:

Left Panel: Contains elements, pages, and symbols that you can add to your site.

Center Canvas: The visual editor where you build and preview your website.

Right Panel: The styling controls for customizing the appearance of selected elements.

Top Bar: Navigation tools, undo/redo buttons, preview options, and publishing controls.

Bottom Bar: Responsive design controls for testing how your site looks on different devices.

Spend time exploring each panel to understand its functions before making major changes to your site.

5. Master the Fundamentals of Webflow's Box Model

Webflow uses a hierarchical structure to organize website elements, following standard web design principles:

  • Section: A full-width container that holds rows of content
  • Container: Centers your content with appropriate margins
  • Columns: Divides containers into responsive columns using Webflow's grid system
  • Elements: Individual components like text, images, or buttons that go inside columns

Understanding this hierarchy is crucial for creating properly structured, responsive websites.

6. Add and Customize Basic Elements

Start building your site by adding fundamental elements:

Text Elements:

  • Click the "T" icon in the left panel to add headings, paragraphs, or links
  • Use the right panel to adjust font, size, color, spacing, and alignment

Images:

  • Click the image icon to add image elements
  • Upload your images or use Webflow's built-in integrations with Unsplash and other sources
  • Adjust size, alignment, and responsiveness in the right panel

Buttons:

  • Add buttons from the elements panel
  • Customize appearance, hover states, and link destinations
  • Create button styles that you can reuse throughout your site

Divs & Containers:

  • Use div blocks to create structural elements
  • Set width, height, background, and other properties
  • Nest elements within divs to create complex layouts

7. Work with Style Systems

Webflow's style systems help maintain consistency throughout your site:

Class System:

  • Create classes to define reusable styles
  • Apply classes to multiple elements to maintain consistent styling
  • Use the Navigator panel to manage your classes

Global Swatches:

  • Define your brand colors as global swatches
  • Use these swatches throughout your design for consistency
  • Update global colors in one place to change all instances

Typography Settings:

  • Create consistent text styles for headings, paragraphs, and other text elements
  • Define font families, weights, sizes, and line heights
  • Apply text styles consistently across your site

8. Build Responsive Designs

Webflow makes it easy to create websites that look great on all devices:

Step 1: Use the device toggle at the bottom of the screen to switch between desktop, tablet, and mobile views.

Step 2: Make device-specific adjustments to layout, size, and positioning.

Step 3: Use Webflow's flexbox and grid layout tools to create naturally responsive designs.

Step 4: Test your site on each breakpoint to ensure a seamless experience across all devices.

9. Add Animations and Interactions

Bring your site to life with Webflow's animation and interaction capabilities:

Basic Animations:

  • Select an element and click the "Animations" tab in the right panel
  • Choose from preset animations or create custom movements
  • Set duration, easing, and delay properties

Interactions:

  • Click the "Interactions" panel in the right sidebar
  • Create trigger-based animations (on click, hover, scroll, etc.)
  • Build multi-step animations using Webflow's timeline editor

Start with simple animations and work your way up to more complex interactions as you gain confidence.

10. Implement Webflow CMS (Content Management System)

For blogs, portfolios, or any site with repeating content structures:

Step 1: Go to the CMS panel and create a new Collection (like "Blog Posts" or "Projects").

Step 2: Define fields for your Collection (title, image, description, date, etc.).

Step 3: Add sample content to your Collection.

Step 4: Create a Collection Page that will display individual items.

Step 5: Create a Collection List to display multiple items from your Collection.

Step 6: Customize the design of both your Collection Page and Collection List.

The CMS is one of Webflow's most powerful features, allowing you to create dynamic websites that clients can easily update.

11. Set Up Navigation and Links

Create user-friendly navigation for your website:

Step 1: Add a Navbar element from the Elements panel.

Step 2: Customize the appearance of your navigation menu.

Step 3: Add and name your menu links to connect to different pages.

Step 4: Create dropdown menus for sections with multiple pages.

Step 5: Configure mobile navigation options for smaller screens.

12. Optimize for Search Engines (SEO)

Webflow makes SEO optimization straightforward:

Step 1: Click on a page in the Pages panel, then select "Page Settings."

Step 2: Add a descriptive title tag and meta description for each page.

Step 3: Set up proper heading structure (H1, H2, H3) throughout your content.

Step 4: Add alt text to all images for accessibility and SEO.

Step 5: Create SEO-friendly URLs in the page settings.

Step 6: Use Webflow's built-in sitemap generation for better indexing.

13. Publish Your Website

When you're ready to share your creation with the world:

Step 1: Click the "Publish" button in the top right corner.

Step 2: Choose your publishing options:

  • Publish to a Webflow subdomain (free)
  • Connect a custom domain (paid plans)
  • Export your code (paid plans)

Step 3: Review your site before final publication.

Step 4: Click "Publish to Selected Domains" to make your site live.

Implementing Your Brand in Webflow

Creating a cohesive brand presence is essential for a professional website. Here's how to implement your brand identity in Webflow:

Establish Your Brand Style Guide

Before diving into design, organize your brand assets:

  1. Logo Files: Prepare your logo in different formats (full color, white version, favicon)
  2. Color Palette: Define primary, secondary, and accent colors with HEX/RGB values
  3. Typography: Select heading and body fonts that align with your brand
  4. Visual Elements: Identify patterns, icons, or specific imagery styles

Create a Global Brand System

Within Webflow, establish global branding elements:

  1. Color Swatches:
    • Navigate to the Styles panel > Colors
    • Add your brand colors as global swatches
    • Name each color descriptively (e.g., "Brand-Primary-Blue")
  2. Typography System:
    • Go to the Styles panel > Typography
    • Add your brand fonts (connect Google Fonts or upload custom fonts)
    • Create text styles for different elements (H1, H2, paragraph, etc.)
    • Define consistent sizes, weights, and line heights
  3. Component Styling:
    • Create consistent classes for buttons, cards, and UI elements
    • Build a "Style Guide" page to reference all brand elements
    • Use Symbols for repeating elements that should remain consistent

Maintain Brand Consistency

As you build out your website:

  1. Apply global styles instead of creating one-off styling for elements
  2. Create Symbols for repeating brand elements like headers, footers, and CTAs
  3. Use your Style Guide as a reference when designing new pages
  4. Implement design patterns consistently throughout the site

This systematic approach ensures your brand looks professional and cohesive across every page of your Webflow site.

Advanced Webflow Features for Growth

As you become more comfortable with Webflow basics, explore these advanced capabilities:

E-commerce Functionality

Webflow's E-commerce feature allows you to build a fully functional online store:

  • Create product collections with variants and options
  • Design custom product pages and category layouts
  • Set up secure checkout and payment processing
  • Manage inventory, shipping, and tax settings

Custom Code Capabilities

Enhance your site with custom code when needed:

  • Add custom HTML, CSS, or JavaScript in the designated areas
  • Embed third-party widgets and tools
  • Connect marketing automation platforms
  • Implement custom tracking and analytics

Webflow Logic

Webflow Logic (new feature) lets you create conditional functionality without code:

  • Build form logic with conditional fields
  • Create personalized content based on user behavior
  • Set up automated workflows and triggers
  • Connect to external services via API

Memberships and Gated Content

For sites requiring user accounts or premium content:

  • Set up user registration and login systems
  • Create members-only content areas
  • Establish different permission levels
  • Build custom user dashboards

Common Challenges and Solutions for Beginners

Challenge 1: Overwhelmed by the Interface

Solution: Start with Webflow University's free courses, which break down the interface step by step. Focus on mastering one panel at a time before moving on.

Challenge 2: Responsive Design Issues

Solution: Build your site desktop-first, then systematically adjust for tablet and mobile. Use flexbox containers instead of fixed positioning for naturally responsive elements.

Challenge 3: Complex Animations Not Working

Solution: Start with simpler animations and build complexity gradually. Check that your trigger elements have the correct dimensions and positioning. Use the Preview mode to test interactions.

Challenge 4: CMS Relationships Confusion

Solution: Sketch your content structure on paper before building in Webflow. Start with simpler collections before attempting complex relationships between different content types.

Challenge 5: Page Load Speed Problems

Solution: Optimize images before uploading, limit the use of heavy animations, and use Webflow's built-in performance tools to identify bottlenecks.

Frequently Asked Questions

Is Webflow completely free for beginners?

Webflow offers a free starter plan that allows you to learn and build two unhosted projects. For publishing websites, plans start at $12/month for basic sites and $29/month for sites with CMS capabilities. There's no time limit on the free plan, making it perfect for learning.

Do I need any coding knowledge to use Webflow?

No coding knowledge is required to create a website with Webflow. The platform's visual interface handles the code generation for you. However, understanding basic web design principles (like the box model and responsive design) will help you create more effective websites.

How does Webflow compare to WordPress?

Webflow offers a more visual, all-in-one design approach compared to WordPress. While WordPress requires separate themes, plugins, and often a page builder, Webflow integrates design, content management, and hosting in one platform. WordPress has a larger plugin ecosystem but often requires more technical maintenance, while Webflow provides a more streamlined experience with professional-grade output.

Can I transfer my domain to Webflow?

Yes, you can transfer an existing domain to Webflow or simply connect your domain while keeping it registered with your current provider. Webflow provides detailed instructions for both options in their help center.

How long does it take to learn Webflow?

Most beginners can create a simple website within a few days of learning Webflow. Mastering more advanced features like the CMS, interactions, and e-commerce typically takes 2-4 weeks of consistent practice. Webflow University offers structured courses that can significantly accelerate your learning.

Is my Webflow site secure?

Yes, all Webflow sites come with SSL certificates for secure HTTPS connections. Webflow also handles security updates and maintenance automatically, removing a significant burden compared to self-hosted platforms.

Can clients update content themselves?

Absolutely. Webflow's Editor mode provides a simplified interface where clients can update text, images, and other content without affecting the design structure. For more complex sites, the CMS gives clients the ability to add or modify structured content like blog posts, team members, or products.

Conclusion

Webflow represents a significant evolution in website creation, offering beginners the ability to create professional websites without the traditional barriers of coding knowledge or design limitations. By following this guide and leveraging Webflow's extensive learning resources, you can quickly progress from complete beginner to confident website creator.

Remember that web design is both a technical and creative skill that develops over time. Don't be afraid to experiment, learn from mistakes, and rebuild sections of your site as you discover better approaches. Each project will improve your understanding and efficiency with the platform.

Whether you're building a personal portfolio, business website, or client project, Webflow provides all the tools you need to create a compelling online presence that stands out in today's competitive digital landscape

Table of contents:

See more

How to Use Webflow for Beginners: Build Professional Websites Without Coding

Webflow has revolutionized website creation by enabling designers, marketers, and entrepreneurs to build professional websites without writing a single line of code. 

If you're new to web design or looking for a more visual, intuitive alternative to traditional website builders, Webflow offers the perfect balance of creative freedom and ease of use.

This comprehensive guide will walk you through everything you need to know to get started with Webflow, from creating your first project to launching your website. 

Whether you're a freelance designer, small business owner, or marketing professional, you'll discover how to leverage Webflow's powerful features to create a stunning online presence.

What is Webflow?

Webflow

Webflow is a visual web development platform that combines the flexibility of custom code with the accessibility of a no-code tool. Unlike traditional content management systems (CMS) like WordPress that separate the design interface from the live site, Webflow's visual editor shows you exactly how your changes will appear in real-time.

At its core, Webflow consists of three main components:

  1. The Designer: A visual canvas where you build and style your website using intuitive drag-and-drop functionality
  2. The CMS: A powerful content management system for creating dynamic, database-driven content
  3. The Editor: A simplified interface that allows you or your clients to update content without affecting the design

What sets Webflow apart from other website builders like Wix or Squarespace is its professional-grade output. The platform generates clean, semantic HTML, CSS, and JavaScript that mirrors what a skilled web developer would write by hand. This results in faster, more SEO-friendly websites that offer maximum design flexibility.

Take your website design to the next level with our stunning collection of Webflow templates. making them more manageable

Why Choose Webflow as a Beginner?

While Webflow has powerful capabilities for professional developers, it's also an excellent platform for beginners for several key reasons:

1. Visual Learning Experience: Webflow's visual interface helps beginners understand web design principles more intuitively. As you drag, resize, and style elements, you're learning the fundamentals of HTML and CSS without having to memorize code syntax.

2. No-Code Design Freedom: Unlike many drag-and-drop builders that limit your design options, Webflow gives you complete creative control without requiring coding knowledge. You can create custom layouts, animations, and interactions that would typically require JavaScript expertise.

3. Professional Results from Day One: Webflow's templates and design capabilities allow beginners to achieve professional-looking results immediately. The platform handles technical details like responsive design, optimization, and cross-browser compatibility automatically.

4. Growth-Ready Platform: As your skills develop, Webflow grows with you. The platform supports everything from simple landing pages to complex, database-driven websites with e-commerce functionality, meaning you won't outgrow it as your projects become more ambitious.

5. Supportive Learning Community: Webflow has invested heavily in educational resources, including Webflow University, an extensive library of tutorials, and a vibrant community forum where beginners can find help and inspiration.

Getting Started with Webflow: Step-by-Step Guide

1. Create Your Webflow Account

Step 1: Visit webflow.com and click on "Get Started" or "Sign Up."

Step 2: Enter your email address, create a password, and verify your account through the confirmation email.

Step 3: Complete your profile by entering your name and answering a few questions about your design experience and goals. This helps Webflow customize your onboarding process.

Pro tip: Start with the free plan to explore Webflow's features before committing to a paid subscription.

2. Navigate the Dashboard

After signing up, you'll arrive at the Webflow Dashboard, which serves as your project management hub. Here you can:

  • Create new projects
  • Access existing websites
  • Manage your account settings
  • View educational resources
  • Track site analytics (on paid plans)

Take a moment to familiarize yourself with the dashboard layout before creating your first project.

3. Start Your First Project

Step 1: Click the "New Site" button on your dashboard.

Step 2: Choose between starting with a template or a blank site:

  • Templates provide professionally designed structures you can customize (recommended for beginners)
  • Blank sites give you complete creative freedom but require more design knowledge

Step 3: If you chose a template, browse the template library by category, style, or purpose. Webflow offers both free and premium templates.

Step 4: Select your template and click "Use Template" or "Create Site" if starting from scratch.

4. Understand the Webflow Designer Interface

The Webflow Designer is where you'll spend most of your time building your website. The interface consists of several key areas:

Left Panel: Contains elements, pages, and symbols that you can add to your site.

Center Canvas: The visual editor where you build and preview your website.

Right Panel: The styling controls for customizing the appearance of selected elements.

Top Bar: Navigation tools, undo/redo buttons, preview options, and publishing controls.

Bottom Bar: Responsive design controls for testing how your site looks on different devices.

Spend time exploring each panel to understand its functions before making major changes to your site.

5. Master the Fundamentals of Webflow's Box Model

Webflow uses a hierarchical structure to organize website elements, following standard web design principles:

  • Section: A full-width container that holds rows of content
  • Container: Centers your content with appropriate margins
  • Columns: Divides containers into responsive columns using Webflow's grid system
  • Elements: Individual components like text, images, or buttons that go inside columns

Understanding this hierarchy is crucial for creating properly structured, responsive websites.

6. Add and Customize Basic Elements

Start building your site by adding fundamental elements:

Text Elements:

  • Click the "T" icon in the left panel to add headings, paragraphs, or links
  • Use the right panel to adjust font, size, color, spacing, and alignment

Images:

  • Click the image icon to add image elements
  • Upload your images or use Webflow's built-in integrations with Unsplash and other sources
  • Adjust size, alignment, and responsiveness in the right panel

Buttons:

  • Add buttons from the elements panel
  • Customize appearance, hover states, and link destinations
  • Create button styles that you can reuse throughout your site

Divs & Containers:

  • Use div blocks to create structural elements
  • Set width, height, background, and other properties
  • Nest elements within divs to create complex layouts

7. Work with Style Systems

Webflow's style systems help maintain consistency throughout your site:

Class System:

  • Create classes to define reusable styles
  • Apply classes to multiple elements to maintain consistent styling
  • Use the Navigator panel to manage your classes

Global Swatches:

  • Define your brand colors as global swatches
  • Use these swatches throughout your design for consistency
  • Update global colors in one place to change all instances

Typography Settings:

  • Create consistent text styles for headings, paragraphs, and other text elements
  • Define font families, weights, sizes, and line heights
  • Apply text styles consistently across your site

8. Build Responsive Designs

Webflow makes it easy to create websites that look great on all devices:

Step 1: Use the device toggle at the bottom of the screen to switch between desktop, tablet, and mobile views.

Step 2: Make device-specific adjustments to layout, size, and positioning.

Step 3: Use Webflow's flexbox and grid layout tools to create naturally responsive designs.

Step 4: Test your site on each breakpoint to ensure a seamless experience across all devices.

9. Add Animations and Interactions

Bring your site to life with Webflow's animation and interaction capabilities:

Basic Animations:

  • Select an element and click the "Animations" tab in the right panel
  • Choose from preset animations or create custom movements
  • Set duration, easing, and delay properties

Interactions:

  • Click the "Interactions" panel in the right sidebar
  • Create trigger-based animations (on click, hover, scroll, etc.)
  • Build multi-step animations using Webflow's timeline editor

Start with simple animations and work your way up to more complex interactions as you gain confidence.

10. Implement Webflow CMS (Content Management System)

For blogs, portfolios, or any site with repeating content structures:

Step 1: Go to the CMS panel and create a new Collection (like "Blog Posts" or "Projects").

Step 2: Define fields for your Collection (title, image, description, date, etc.).

Step 3: Add sample content to your Collection.

Step 4: Create a Collection Page that will display individual items.

Step 5: Create a Collection List to display multiple items from your Collection.

Step 6: Customize the design of both your Collection Page and Collection List.

The CMS is one of Webflow's most powerful features, allowing you to create dynamic websites that clients can easily update.

11. Set Up Navigation and Links

Create user-friendly navigation for your website:

Step 1: Add a Navbar element from the Elements panel.

Step 2: Customize the appearance of your navigation menu.

Step 3: Add and name your menu links to connect to different pages.

Step 4: Create dropdown menus for sections with multiple pages.

Step 5: Configure mobile navigation options for smaller screens.

12. Optimize for Search Engines (SEO)

Webflow makes SEO optimization straightforward:

Step 1: Click on a page in the Pages panel, then select "Page Settings."

Step 2: Add a descriptive title tag and meta description for each page.

Step 3: Set up proper heading structure (H1, H2, H3) throughout your content.

Step 4: Add alt text to all images for accessibility and SEO.

Step 5: Create SEO-friendly URLs in the page settings.

Step 6: Use Webflow's built-in sitemap generation for better indexing.

13. Publish Your Website

When you're ready to share your creation with the world:

Step 1: Click the "Publish" button in the top right corner.

Step 2: Choose your publishing options:

  • Publish to a Webflow subdomain (free)
  • Connect a custom domain (paid plans)
  • Export your code (paid plans)

Step 3: Review your site before final publication.

Step 4: Click "Publish to Selected Domains" to make your site live.

Implementing Your Brand in Webflow

Creating a cohesive brand presence is essential for a professional website. Here's how to implement your brand identity in Webflow:

Establish Your Brand Style Guide

Before diving into design, organize your brand assets:

  1. Logo Files: Prepare your logo in different formats (full color, white version, favicon)
  2. Color Palette: Define primary, secondary, and accent colors with HEX/RGB values
  3. Typography: Select heading and body fonts that align with your brand
  4. Visual Elements: Identify patterns, icons, or specific imagery styles

Create a Global Brand System

Within Webflow, establish global branding elements:

  1. Color Swatches:
    • Navigate to the Styles panel > Colors
    • Add your brand colors as global swatches
    • Name each color descriptively (e.g., "Brand-Primary-Blue")
  2. Typography System:
    • Go to the Styles panel > Typography
    • Add your brand fonts (connect Google Fonts or upload custom fonts)
    • Create text styles for different elements (H1, H2, paragraph, etc.)
    • Define consistent sizes, weights, and line heights
  3. Component Styling:
    • Create consistent classes for buttons, cards, and UI elements
    • Build a "Style Guide" page to reference all brand elements
    • Use Symbols for repeating elements that should remain consistent

Maintain Brand Consistency

As you build out your website:

  1. Apply global styles instead of creating one-off styling for elements
  2. Create Symbols for repeating brand elements like headers, footers, and CTAs
  3. Use your Style Guide as a reference when designing new pages
  4. Implement design patterns consistently throughout the site

This systematic approach ensures your brand looks professional and cohesive across every page of your Webflow site.

Advanced Webflow Features for Growth

As you become more comfortable with Webflow basics, explore these advanced capabilities:

E-commerce Functionality

Webflow's E-commerce feature allows you to build a fully functional online store:

  • Create product collections with variants and options
  • Design custom product pages and category layouts
  • Set up secure checkout and payment processing
  • Manage inventory, shipping, and tax settings

Custom Code Capabilities

Enhance your site with custom code when needed:

  • Add custom HTML, CSS, or JavaScript in the designated areas
  • Embed third-party widgets and tools
  • Connect marketing automation platforms
  • Implement custom tracking and analytics

Webflow Logic

Webflow Logic (new feature) lets you create conditional functionality without code:

  • Build form logic with conditional fields
  • Create personalized content based on user behavior
  • Set up automated workflows and triggers
  • Connect to external services via API

Memberships and Gated Content

For sites requiring user accounts or premium content:

  • Set up user registration and login systems
  • Create members-only content areas
  • Establish different permission levels
  • Build custom user dashboards

Common Challenges and Solutions for Beginners

Challenge 1: Overwhelmed by the Interface

Solution: Start with Webflow University's free courses, which break down the interface step by step. Focus on mastering one panel at a time before moving on.

Challenge 2: Responsive Design Issues

Solution: Build your site desktop-first, then systematically adjust for tablet and mobile. Use flexbox containers instead of fixed positioning for naturally responsive elements.

Challenge 3: Complex Animations Not Working

Solution: Start with simpler animations and build complexity gradually. Check that your trigger elements have the correct dimensions and positioning. Use the Preview mode to test interactions.

Challenge 4: CMS Relationships Confusion

Solution: Sketch your content structure on paper before building in Webflow. Start with simpler collections before attempting complex relationships between different content types.

Challenge 5: Page Load Speed Problems

Solution: Optimize images before uploading, limit the use of heavy animations, and use Webflow's built-in performance tools to identify bottlenecks.

Frequently Asked Questions

Is Webflow completely free for beginners?

Webflow offers a free starter plan that allows you to learn and build two unhosted projects. For publishing websites, plans start at $12/month for basic sites and $29/month for sites with CMS capabilities. There's no time limit on the free plan, making it perfect for learning.

Do I need any coding knowledge to use Webflow?

No coding knowledge is required to create a website with Webflow. The platform's visual interface handles the code generation for you. However, understanding basic web design principles (like the box model and responsive design) will help you create more effective websites.

How does Webflow compare to WordPress?

Webflow offers a more visual, all-in-one design approach compared to WordPress. While WordPress requires separate themes, plugins, and often a page builder, Webflow integrates design, content management, and hosting in one platform. WordPress has a larger plugin ecosystem but often requires more technical maintenance, while Webflow provides a more streamlined experience with professional-grade output.

Can I transfer my domain to Webflow?

Yes, you can transfer an existing domain to Webflow or simply connect your domain while keeping it registered with your current provider. Webflow provides detailed instructions for both options in their help center.

How long does it take to learn Webflow?

Most beginners can create a simple website within a few days of learning Webflow. Mastering more advanced features like the CMS, interactions, and e-commerce typically takes 2-4 weeks of consistent practice. Webflow University offers structured courses that can significantly accelerate your learning.

Is my Webflow site secure?

Yes, all Webflow sites come with SSL certificates for secure HTTPS connections. Webflow also handles security updates and maintenance automatically, removing a significant burden compared to self-hosted platforms.

Can clients update content themselves?

Absolutely. Webflow's Editor mode provides a simplified interface where clients can update text, images, and other content without affecting the design structure. For more complex sites, the CMS gives clients the ability to add or modify structured content like blog posts, team members, or products.

Conclusion

Webflow represents a significant evolution in website creation, offering beginners the ability to create professional websites without the traditional barriers of coding knowledge or design limitations. By following this guide and leveraging Webflow's extensive learning resources, you can quickly progress from complete beginner to confident website creator.

Remember that web design is both a technical and creative skill that develops over time. Don't be afraid to experiment, learn from mistakes, and rebuild sections of your site as you discover better approaches. Each project will improve your understanding and efficiency with the platform.

Whether you're building a personal portfolio, business website, or client project, Webflow provides all the tools you need to create a compelling online presence that stands out in today's competitive digital landscape

Table of contents:

See more

How to Use Webflow for Beginners: Build Professional Websites Without Coding

Webflow has revolutionized website creation by enabling designers, marketers, and entrepreneurs to build professional websites without writing a single line of code. 

If you're new to web design or looking for a more visual, intuitive alternative to traditional website builders, Webflow offers the perfect balance of creative freedom and ease of use.

This comprehensive guide will walk you through everything you need to know to get started with Webflow, from creating your first project to launching your website. 

Whether you're a freelance designer, small business owner, or marketing professional, you'll discover how to leverage Webflow's powerful features to create a stunning online presence.

What is Webflow?

Webflow

Webflow is a visual web development platform that combines the flexibility of custom code with the accessibility of a no-code tool. Unlike traditional content management systems (CMS) like WordPress that separate the design interface from the live site, Webflow's visual editor shows you exactly how your changes will appear in real-time.

At its core, Webflow consists of three main components:

  1. The Designer: A visual canvas where you build and style your website using intuitive drag-and-drop functionality
  2. The CMS: A powerful content management system for creating dynamic, database-driven content
  3. The Editor: A simplified interface that allows you or your clients to update content without affecting the design

What sets Webflow apart from other website builders like Wix or Squarespace is its professional-grade output. The platform generates clean, semantic HTML, CSS, and JavaScript that mirrors what a skilled web developer would write by hand. This results in faster, more SEO-friendly websites that offer maximum design flexibility.

Latest Post

How to Use Webflow for Beginners: Build Professional Websites Without Coding
Webflow

How to Use Webflow for Beginners: Build Professional Websites Without Coding

Learn how to use Webflow to create stunning, professional websites without coding skills. Our beginner's guide covers everything from setup to publishing.

April 13, 2025
Webflow vs Framer: Which One Should You Choose?
Webflow

Webflow vs Framer: Which One Should You Choose?

Webflow vs Framer, Compare features, usability, and functionality to choose the best platform. Discover why Webflow stands out for versatile, scalable, and professional websites.

March 23, 2025
Webflow AI: Transform Your Website Design Instantly!
Webflow

Webflow AI: Transform Your Website Design Instantly!

Transform your website design with Webflow AI effortlessly. Create stunning, responsive, and engaging websites in no time. Boost creativity and user experience instantly!

March 16, 2025