
Have you ever wanted to track the success of your website using Facebook Pixel? Well, now you can with the help of Webflow! In this blog post, we’ll provide an easy-to-follow guide on How to Add Facebook Pixel to Webflow so that you can measure your website’s success and maximize your online presence.
What is Facebook Pixel and Why Should You Use It
Facebook Pixel is a JavaScript code that has several functions, including measuring, optimizing, and audience building for your campaigns. With Facebook Pixel, you can keep track of conversions by monitoring actions that result from your ads, which is essential for the success of your Facebook ad campaigns.
Moreover, it provides an opportunity to market to people who interact with your website and create a look like audience tracking pixel with a minimum of 100 conversions. In summary, Facebook Pixel is crucial for optimizing your ad campaigns and audience building on Facebook.
How to Add Facebook Pixel to Webflow
Here is a step-by-step guide on how to add Facebook Pixel to Webflow:
Step 1: Access Your Facebook Pixel
Go to facebook.business.com and click the “Business Manager” tab on the homepage. From the drop-down menu, select “Pixels” to access your Facebook pixel.
Step 2: Create a Pixel
On the Pixel page, click “Create a Pixel” to create your own Facebook pixel.
Step 3: Name Your Pixel
Give the pixel a name and click “Create Pixel” to proceed.
Step 4: You’re Done!
Congratulations! Your Facebook pixel has been created.
30+ Top-notch Webflow Templates
Take your website design to the next level with our stunning collection of Webflow templates.
Adding the Facebook Pixel Code to Webflow
Here are a few steps for how to add Facebook pixel to Webflow site –
Find Your Pixel ID
Navigate to Data Sources in Facebook Business Manager and locate your Pixel ID. It will be a 15 digit code. Copy this code.
Open Webflow Project Settings
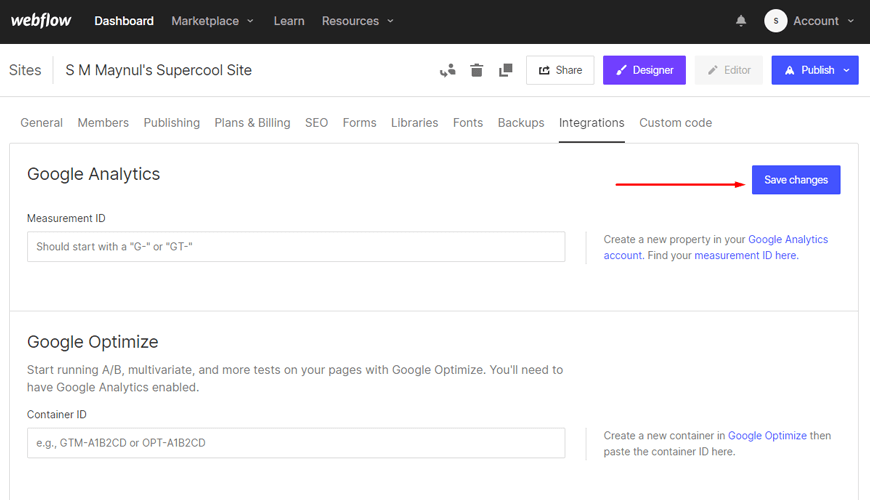
Open your Webflow project and navigate to Project Settings. Find Integrations and click Facebook Pixel.

Paste Your Pixel ID
Paste your Facebook Pixel ID into the field provided.
Save Changes
Click Save Changes to save your Facebook Pixel code to your Webflow project.
Recommended Blog for You
👉 How to Add Google Analytics to Your Webflow Site – Step by Step Guide
👉 How to Add Webflow Background Video: Step-by-Step Guide
👉How to Add Custom CSS in Webflow: The Step-by-Step Guide
👉 Setting Up Your Custom Domain on Webflow: A Step-by-Step Guide
Benefits of Using the Facebook Pixel on Webflow
Using the Facebook Pixel on Webflow offers several benefits:
Better targeting:
The Facebook Pixel allows you to track user behavior on your website and utilize the data to generate more targeted Facebook ad campaigns. It could lead to higher conversion rates and lower advertising expenses.
Improved measurement:
Pixels provide detailed data about how users interact with websites, which can help you find areas for improvement and optimize your website for better performance.
Custom audiences:
The Pixel enables you to create custom audiences based on user activity on your website. You can utilize this tool to retarget users who have previously expressed interest in your products or services, resulting in more effective ad campaigns.
Lookalike audiences:
You can use the Pixel to generate lookalike audiences or groups of people who resemble your current customers by examining user behavior on your website. You could be able to reach new potential clients in this way who are more likely to be interested in your goods or services.
30+ Top-notch Webflow Templates
Take your website design to the next level with our stunning collection of Webflow templates.
Frequently Asked Questions
Can I use Facebook Pixel on my Webflow site?
Yes! Webflow makes it easy to add Facebook Pixel to your site so that you can take advantage of this powerful Facebook tracking pixel tool.
How do I add Facebook Pixel to my Webflow site?
Adding Facebook Tracking Pixel to your Webflow site is a simple process. First, create a Facebook Pixel account and generate a unique Pixel ID code. Then, you can add the Pixel ID code to your Webflow site by pasting it into the “Head Code” section of your site’s “Custom Code” settings.
What kind of data can Facebook Pixel track on my Webflow site?
Facebook Pixel can track a wide range of user behavior on your website, including page views, clicks, form submissions, and purchases. In addition, you can customize your Pixel settings to track specific Facebook pixel standard events or actions that are important to your business goals.
Get Exclusive Webflow Services from Brandbes
Making your business stand out online can be overwhelming, but with the help of Brandbes‘ Webflow services, you can achieve your online goals without breaking a sweat. As they understand every business is different, they offer personalized template designs and development services to meet your specific demands.

With their team of experts in Webflow projects, you can be confident that you’re in good hands as they’ve helped thousands of clients achieve their online objectives. They offer a selection of user-friendly templates, so building your website or online shop can be effortless.
Moreover, their support team is readily available and knowledgeable, making the journey even more seamless. With Brandbes’ premium Webflow services, you’re one step closer to boosting your online presence.
Final Thoughts on Adding the Facebook Pixel to Webflow
In online marketing, the Facebook Pixel is quickly becoming a must-have tool in any marketer’s arsenal. And with Webflow making it easier than ever to add the Pixel to your website, there’s no reason not to take advantage of this powerful feature.
You’ll gain insights into your audience and their interests by tracking user behavior and gathering valuable data. This information can be used to refine your ad targeting, improve conversion rates, and ultimately increase your bottom line. So, don’t worry, about how to add the Facebook pixel to Webflow. Simply follow the steps and start harnessing the power of the Facebook Pixel for your Webflow site.


